
How To Cut Logs For Log Cabin? Expert Explain
People don’t know, but building a log cabin is much easier, compared to building a house from bricks, but this can also be tricky. You need to pay attention to choosing the ideal logs for your log cabin because you cannot just choose them randomly. To make sure that your log cabin is stable, you should take great care and correctly treat your logs. If you do not know how you should do this, we will explain to you everything that you need to know.
In this article, we will talk about calculating the right amount of logs you may need for your home, the process of sourcing the logs, and finding the right trees for cutting. You will also find out what to do when you cut your logs and how to dry them before using them. So, let’s start.
Table of Contents
How To Cut Logs For Log Cabin?
So How To Cut Logs For Log Cabin? To properly cut the logs, you need to choose the type of wood you will use and calculate the exact number of logs that you’ll need for your log cabin. Before cutting down trees be sure to check the leaning direction. Lastly, logs need to be stored and dried properly.
In the next sections of this article, we’ll talk much more in detail about how to cut logs for your log cabin and what you need to know.
You will also be interested in this article, so be sure to read 7 Essential Log Cabin Tools Required to Build a Log Cabin.
How Many Logs Will You Need?
Before doing anything, you should calculate the number of logs you will need for your cabin. It can be helpful to study other types of cabins when thinking about ordering logs or cutting them yourself because this way, you will know how much you’ll need. Draw a detailed example of your future log cabin and use that example when building it. Measure everything you need and put it on the example you drew.
Calculation example for a 18FT x 26FT log cabin:
- 9 FT Tall Log Cabin (around 108” in height)
- 12” Log Diameter
- 9 Logs per width (12” x 9 logs)
Note! Remember that each log has to be a 4FT extra length
Total calculation:
- 18 Logs; 24FT x 12” Diameter
- 18 Logs; 28FT x 12” Diameter
Note! Remember that you’ll need additional logs for your roof.
This will help you figure out how many logs you need for your cabin. For walls with windows or doors, you do not need full-length logs. In this case, you can use the logs part or cut them into parts. If you plan this well enough, you can use every part of your tree and even curved trees but only the straight part.
What Kind of Wood Is the Best?
Many different kinds of wood can be used to build log homes but the most used ones are softer like pine, cedar, fir, or spruce. It may be best to use up the woods you have around the place you are going to build your cabin. This way you will be sure that the wood is good for the weather of this place and it will probably be a cheaper option since it is already available there.
Fitting It All Together
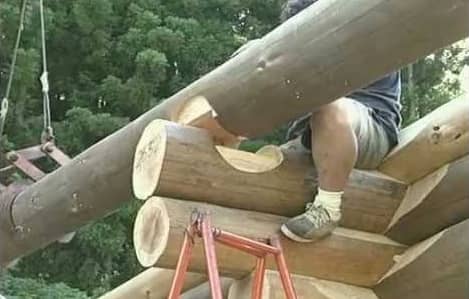
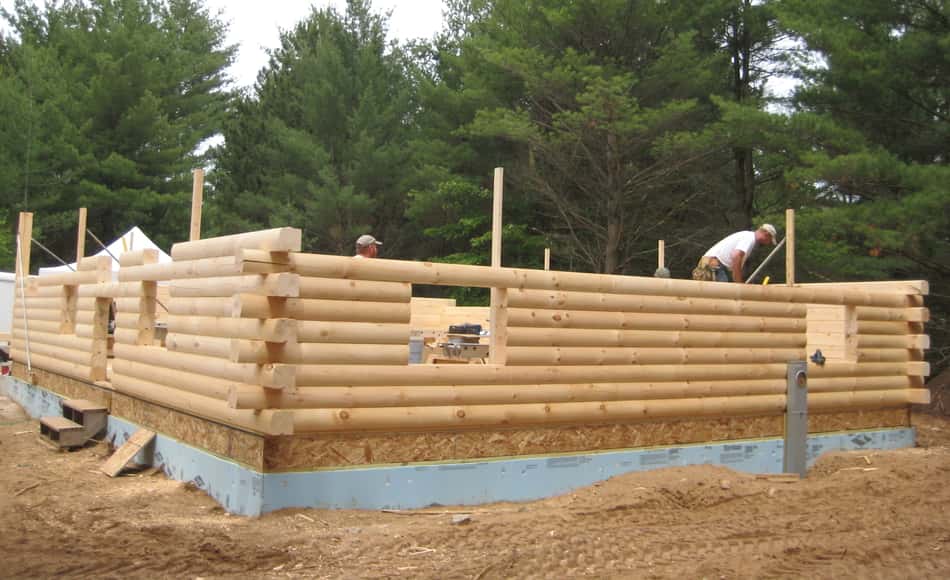
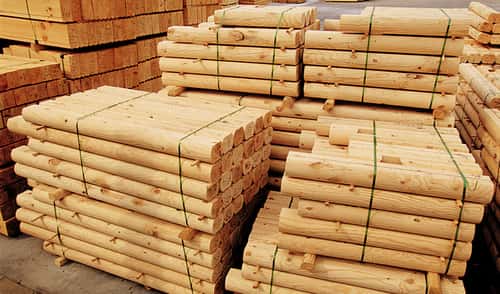
You should use milled logs because their profile is designed in a way that they fit well together in any log cabin. This makes your log home energy efficient. Logs should be put together in a way that they interlock and that their bottom and top match. The log caulking, insulation, or the caulking cord should be positioned so that the air cannot enter the inside of a cabin. Those top and bottom parts can be smooth, coped, or perhaps tongue-and-groove.
Milled logs are usually sold by linear feet (from 8 to 16 feet). If logs are longer than the suggested length, they may be too heavy and not easy to move. When you are positioning logs around windows and doors, they should be shorter. If you need longer logs you can try breaking them up at an intervening wall.
Related Article: Log Cabin Fire (Everything You Need to Know)
Source The Logs
A bunch of options exist for sourcing your logs. It may be the easiest to buy them or to look for a tree feller (but that is also the most expensive option). In a sawmill, they can cut your logs to the right length but they will probably charge you more than necessary.
The less expensive solution is to cut your own trees, especially if you own land where many trees grow or if you know somebody who has trees. It can also be better for you to know that this way you prepared logs on your own and that you can be sure of their quality.
If you decide to cut your own logs, you should cur them in early winter because of the low sap levels. Because of the cold, the drying time is slower so the probability of cracks and splits is reduced when you cut trees. Also, the cold helps with less insect presence and also fewer fungi or mold.
It may be helpful to check your trees before cutting them and mark the best ones after the inspection. You need to make sure that the trees are straight everywhere, while the log diameter is similar as much as possible at the ends.
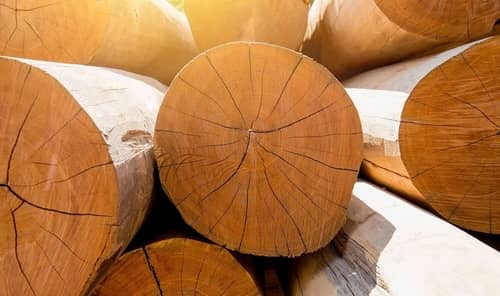
Note! It depends on how you prefer, but logs needs to be between 8-10 inches in diameter, and to have minor tapering. In a 16 foot long tree, tapering needs to be a maximum of 2 inches.
Fell the Trees
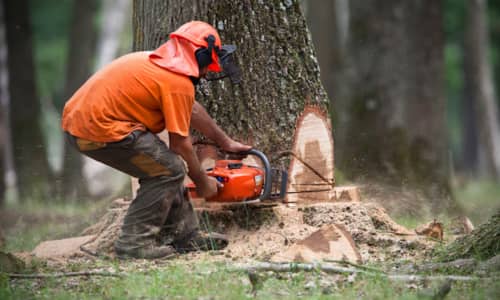
Safety is the most important thing when it comes to felling the trees, so you should make sure that you have everything that is obligatory!
You need:
- A hamlet that has a face screen protector for your eyes
- A pair of safety glasses
- A kevlar leg protector
- Steel toe cap boots
Additional things:
- A chainsaw
- An axe
- A wedge
The best way to cut down trees is to check the leaning direction. If you cut it in the right way, it will fall in the direction where the tree leans. Before cutting it, make sure that you clear the area where the tree will land and not be near the tree when it starts falling. It can fall on another tree and bounce off it, so it may land somewhere else, and you may be in danger. You can avoid all this by checking the surrounding area before starting to cut.
Note! Do not ever cut trees when it is windy outside because it can be dangerous both for you and your surroundings. It is better to come back another day to perform this action.
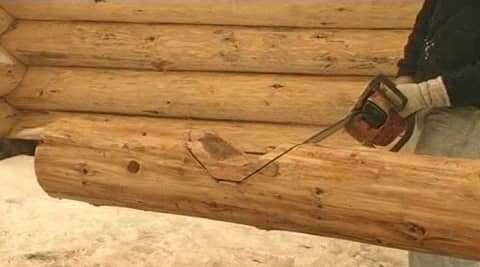
After you figure out which way the cut tree will fall, do a horizontal cut on that side of the tree but make sure that it is not higher than your hip (1/3 into the tree). The next step is to make a cut that will be on a 45-degree angle and meet the first cut that you made.
The third cut is next, and it should be on the opposite side and around 2 inches above the cut you made first. Your cut should be around 1/10 of the tree’s thickness. Your tree will probably start falling after this cut. However, if this isn’t the case, just drive a wedge where the cut is made. This will speed up the process of falling.
It would be great if you could cut a few extra trees just in case of splitting or infections. When you cut all of them, you should start with measuring. Use the measurements you made before and cut the logs. It would work best if you cut them a few inches over the measure so that you can go back to the cut and fix it afterward.
Pick the four logs that have the largest length and diameter to use for top plates and sills. For the top plates, you should use logs that are at least two feet longer than the other ones. This is because they need to support the gable. Make sure not to cut down many trees from the same area because it can be harmful to the environment, but also some trees may benefit from it (the extra space and light).
Transport of the Logs
If you decide to build your log cabin around the same area that you cut your trees from, you need to make sure that you have a clear path that you can use for moving the logs to the storage place. During the winter, the ground can be hard and also icy, which makes the logs much easier to move around than during any other season.
It will be best to carry them, but if your future log cabin is too far, you will need to look for transportation. Transporter chains or a lumber conveyor are ideal for this situation.
Debark
The next step is to debark your future logs. It can be easy to peel it off by straddling the logs and using a drawknife. It is best to peel at a 30-degree angle and towards yourself. If you have some of the bark that is harder to peel, you can use a bark spud for help.
Note! Make sure not to take off the gear that is protecting your eyes when removing the bark.
Process of Drying
When you peel your logs, you need to store them and allow logs to dry properly. Make sure not to put them on the ground or near water. If you are not drying your logs inside, you can use a tarpaulin cover to protect them. There should be exposure to air from every side. For this, the stickers are used (skids), and they are made of wood (3/4” x 11/2”) and they add space between your logs. This helps with ventilation and, therefore, better drying.
It is recommended that the ends of your logs are sealed because the moisture dries up 10-12 times quicker from the ends. This may cause cracks or ring separation to appear. Paraffin wax, latex paint, shellac, and polyurethane can be used to seal the ends. You can also buy end-grain sealants that are made for this purpose. We recommend that you seal the ends as soon as your tree falls because the quicker you seal them the better your drying process will be.
Have in mind that the drying process lasts for a year or two at least. This can vary from the wood type and its thickness, but it will likely not be less than that. It will be better to prepare this a few years in advance so that your logs can dry for a longer period.
It is also important that your logs adopt equilibrium moisture when they neither gain nor lose it. They acclimatize, and this changes due to climate’s nature. Equilibrium is very dynamic, and it changes throughout the whole year.
You can also kiln-dry your logs. This is a rapid method of drying the logs that many companies use, but it can cause cracks. When logs that have a larger diameter are dried this way, the moisture can exit the log faster from the outside than from the center, which causes cracks. Its benefit is the quickness and the way it can kill fungi or insects that are in your logs.
Sometimes it can be better to dry your logs in a natural way because it is not worth risking the whole effort you put into this project just to be over quickly.
For those who want to learn more, read the Pros And Cons Of Log Cabin Homes.
FAQ: People Also Ask
Can you build a log cabin with green logs?
If you want to build your log cabin out of green logs (green white pine), you can easily do that. Just make sure to use quality sealant and chinking.
Final Thoughts
From this article, you learned about the number of logs you need for building a log cabin, as well as how to cut, debark and dry them. When you finish with these steps you can easily start building the log house of your dreams. It may be hard at first but when you get a hang of it, you will realize that this is a fun and interesting process. If you have any additional questions, feel free to ask.