How to Waterproof RV Shower Walls? (14 Easy Steps)
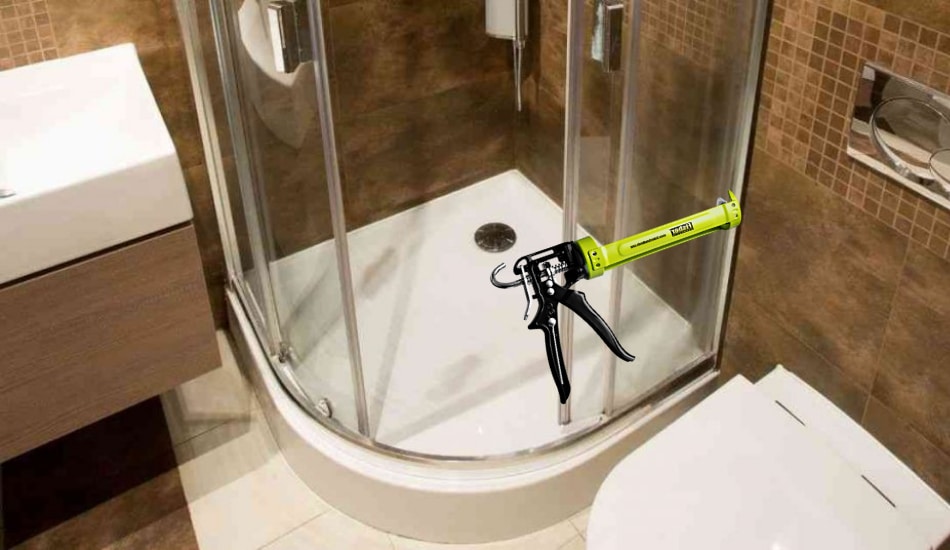
Having a shower in your RV (recreational vehicle) is definitely a big advantage. With it, there is no need to wait hours for a shower in a hotel during a long trip, nor to stand in lines for a public shower in camps. Whenever you want to throw yourself under a cold or hot shower, you simply can in your RV, and in the blink of an eye, you are clean and ready for any challenge.
Although having a shower in your RV is a great thing, only if you take good care of it. Otherwise, it becomes a problem rather than an advantage. The most common question asked by inexperienced RV owners is whether their shower has a waterproof floor and walls. However, they are also want to know how to waterproof their showers. In this article, we’ll talk about that. Let’s start!
Table of Contents
How to Waterproof RV Shower Walls?
So How to Waterproof RV Shower Walls? First, turn off the water supply in your RV. Place the RV Shower surround on the walls, use a paint roller and squeeze the glue into the wall. Use painter’s tape and add it to the edges of the shower surround. Leave them to dry for around 48 hours, and remove them after the surface is dry.
Are RV Shower Walls Waterproof?
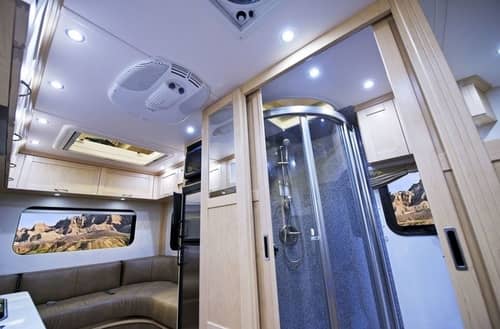
The answer to this question is the subject of numerous discussions and disagreements among many campers in the RV forum community. The official standpoint, especially of RV manufacturers, is that RV showers are waterproof and that the vehicle owner doesn’t have to do anything to protect themselves from leaks. But some think differently, especially when it comes to older RV vehicles for which additional insulation of the walls from water penetration is recommended.
In older models of RVs and often in used vehicles that the previous owner remodeled, including the shower rooms, you can find partition walls made of Luan (also called Lauan). It is a material based on the lauan tree originating from the countries of Southeast Asia, most often the Philippines.
It is a material that has a good price, and that looks good for RV, which is why it’s popular. But one should know that when this material is used as a wall next to an RV shower, the luan wood wall is a surface covered with paper treated with chemicals. In this way, water resistance is obtained. But in the long run, it is not a waterproof material.
Why It Is Important To Have Waterproof RV Shower Walls
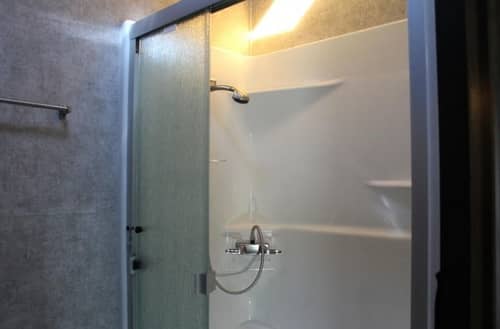
You have to keep in mind that showers in RVs are not like the ones you have at home. Water that comes out of them is weaker due to lower pressure and water consumption is limited by the amount you have in your RV tank. This means that showering in an RV can only last for a few minutes. But even those few minutes are enough to cover the sides of the shower with water.
We mentioned earlier that some RV shower walls are usually more water-resistant than waterproof. What’s the difference? Water resistant surfaces may not leak water directly, but they are still greatly affected by moisture, which causes rot and cracks.
What is the best solution to this problem? RV experts claim that installing a new shower surround is good for the vehicle not only because of the water-tightness of the walls but also because of the opportunity to refresh the look of the shower in the RV. If you are skilled in DIY projects and if you are ready to spend four to five hours decorating your RV, this is an easy job.
Note! It is not recommended to perform this procedure on the RV during its use, but rather outside the camping season.
Below we bring you a guide on how to install a new shower wall in an RV that will help you through the process.
Things That You’ll Need
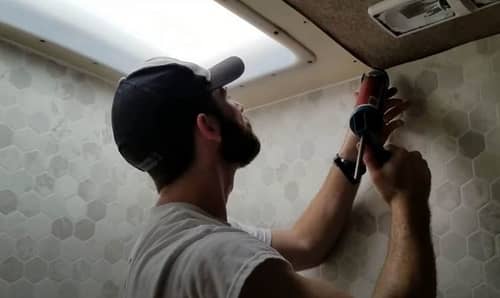
As with any other DIY project, you must first provide everything you need to get the job done. You will agree that in DIY projects, the worst part is when you are halfway done with the work and then realize that you are missing a key part to finish it!
Shower Surround – A large selection of shower surrounds can be found in online stores like Amazon, but also in classic stores that sell camping equipment. Before buying, carefully measure the shower in your RV and double-check these measures to make sure you are buying exactly what you need.
- Cutting tool
- Drilling tool (for help in cutting)
- Strong adhesive (such as Gorilla glue). Use a clear option because visible glue can spoil the finished look.
- Screws (to secure the surrounding wall)
- Painter’s tape in a roll
- Waterproof caulk
- Roller for paint
- Pencil
How To Install an RV Shower Surround?
- Turn off the water supply and drain out all remaining water.
- Make sure to remove the shower head.
- Measure and precisely mark the spot for the water hoses.
- Carefully cut needed holes.
- Place the shower surround on the marks to ensure your cutouts are right.
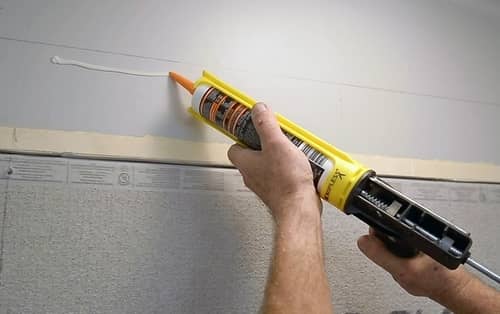
- To the back of the shower surround, put a coating of Gorilla or any other similar glue. Pay attention to the edges. These are the parts where you want to have the best adhesion.
- Then, put the RV shower surround in the shower. By using a paint roller be sure to press the glue into the wall.
- To secure your RV shower even better, add screws on the curb at equal intervals.
- Around the edges of the surround, add painter’s tape. Leave it to dry for around 48 hours.
- When everything is dry, be sure to remove the painter’s tape.
- Go around all the edges to caulk.
- Make sure to replace the water line and the showerhead also.
- Do a test to make sure that everything is working
- That’s it! Now you have a new waterproof RV shower.
Additional Installation Tips to Keep In Mind
Work Slowly
Having a shower in an RV is a big advantage. This is why many RV owners prefer RV camping over tent camping. Therefore, if the shower in your RV doesn’t work properly, your camping will not be as much fun.
Keep in mind that even the slightest water leak caused by a poorly installed shower surround in RV can cause great damage over time. When RV owners are installing a shower surround, they are usually in rush, and for that reason they miss things. Our recommendation is to take the job slowly, work with caution, and keep in mind that if you have problems with something, you can always seek the help of a professional.
Look Around
There is a really large selection of RV shower surrounds on the market. As they are all waterproof, when shopping, you should focus the most on the color that suits you best. Other important things to look for are the shower measurements, function, and price.
We recommend purchasing through an online shop because, with every shower surround option, you can find the opinion of the user, which can help you shop smart. Many RV users love to help, and their product reviews are often very useful. You can even find additional tips related to installing a surround shower with them.
Choose Quality Over Price
When choosing a shower surrounding we would all like to save as much money as possible. No one wants to spend more money than they have to. But when choosing the shower surround, don’t buy the cheapest one on the market. Cheap shower surrounds are usually not good because they are made of poor-quality material. When you install such a thing into your RV shower, you can only worsen the previous condition.
How to Avoid Yellowing RV Showers
Once you have installed the new shower surround in your RV, keep in mind that you have to work on regular maintenance so that you do not find yourself in a situation where the surround starts to yellow. Here we’ll give you a few tips on how you can do this. Make sure to read them carefully.
Regularly Clean Your Shower
If you want a clean white shower in your RV, be sure to clean it regularly. When we talk about RVs and cleaning, carefully choose what cleaning products you will use. Do not use strong agents, especially not those based on bleach. Rather use mild versions of detergents.
Clean Your Shower Clean Between Showers
We advise you to buy a shower cleaning spray and use it between two showers. We recommend Daily Shower Cleaner Scrubbing Bubbles. This shower spray uses the steam from the shower so you can clean it gently.
When using such sprays, you will generally have to clean your shower much less often. By using this method, you can add a SPA atmosphere to your shower! For cleaning between two showers, use a cleanser with the addition of eucalyptus which will surely help you relax and clean your sinuses well. Method Daily Shower Cleaner is a good choice.
Regularly Check Your Caulk
Remember that caulk does not last forever. They wear over time, even if you buy the best one. When this happens, the shower will start to leak. Check the condition of the caulks in your RV shower regularly to avoid unexpected leaks. When the need for re-caulk comes, it is recommended to use a waterproof silicone caulk so it can last longer.
Also, be sure to read this related article How to Drain an RV Fresh Water Tank (Step-by-Step).
FAQ: People Also Ask
1. What are the pros when you waterproof your RV walls?
The benefits are many. In addition to getting a better look with the new waterproof shower surround, it also protects your shower and the entire RV from water damage. Once the RV is damaged by water, it can be expensive to repair it, so try to avoid this.
Of course, the new surround shower will significantly improve your RV shower decor. When buying, you may notice that they are available in different designs. Also, some models offer built-in holding handles, soap niches, and other benefits that make RV showering more comfortable.
2. How To Check If RV shower pan is waterproof to the surround?
You can do this best if you seal the edges well and do so with a generous amount of sealant. In order not to spoil the visual impression with too much sealant, be sure to use a transparent caulk from silicon.
3. How much costs to install a new RV shower surround?
The cost of installing new shower surrounds depends on which model you choose. The cheapest, basic models can be found from $150 to $200, while more expensive models with special accessories and doors, made from higher quality materials, can cost up to $600. If you buy a more demanding model of shower surround, you should keep in mind that you may not be able to install it yourself but that you will need professional help.
4. Are skylight shower walls waterproof?
Skylights in showers are a great innovation, but also they have no connection points with the shower itself. The skylight is located above the shower to allow more shower light. Clearly, it is very important for Skylight to be waterproof so that the rain does not leak inside. If you can’t do the job yourself, it’s best to leave it to a professional.
5. Can You paint the RV shower surround and still keep it waterproofed?
This is certainly possible, you just have to use waterproof paint for the job. A colored shower surround is a good idea because you can effectively visually improve the look of your shower since most shower surrounds on the market are beige or white. You can use spray paint for this purpose or use standard paint that you apply with a roller. The spray is always a better solution if you pay attention to detail.
Final Word
When we own an RV, at first glance, it seems like there is a lot of work that we need to do, but in the end, it pays off. This is also true when it comes to achieving the best possible performance of an RV shower. You certainly don’t want to bother about shower surround and then end up in the shower queue again among those camping in a tent. You need to remember that all shower walls are waterproof at the time of purchase.
If you only have thin plastic on the walls in your shower, and you don’t want to find yourself in a situation where you have to cancel your trip just because of the shower, then it’s time to line the shower walls. Remove the plastic and install a surround of quality material. I hope that this article has helped you.


I don’t think the title of your article matches the content lol. Just kidding, mainly because I had some doubts after reading the article.