
4 Ways to Tell If an RV Thermostat Is Bad
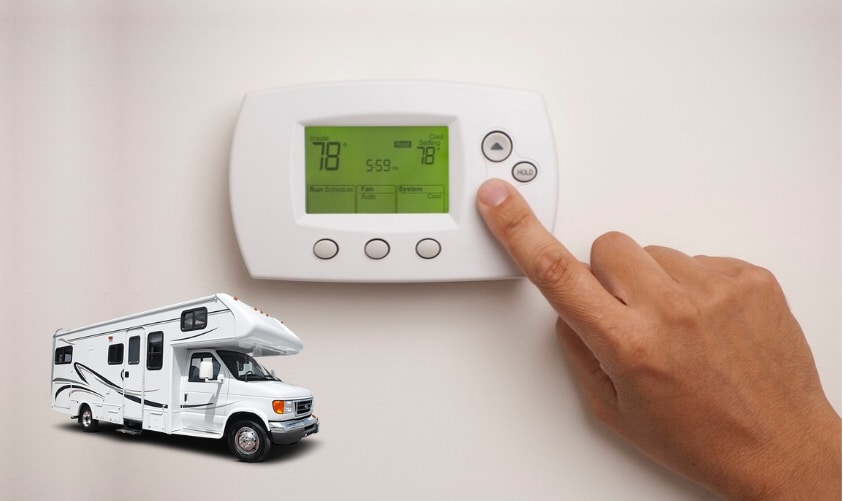
While you may not expect this, the thermostat that controls your RV’s AC cooling and heating system may turn bad. The usual lifespan of a thermostat is between 10 and 15 years. If you bought a used RV, you can expect a problem with a bad thermostat even sooner.
The most common reasons a thermostat may stop working are dust, old wiring, or poor wiring. If the thermostat in your RV does not work for any reason, it is definitely an uncomfortable situation, especially during summer. In this article, we bring you an overview of the most common reasons for thermostat failures and the ways how you can fix them. So, let’s start!
Table of Contents
How To Tell If an RV Thermostat is Bad?
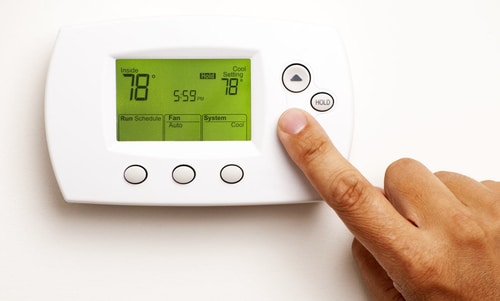
How to tell if an RV thermostat is bad? Typically, the sign of a bad thermostat is a blank screen or when the thermostat is not responding to temperature adjustments. Changing a thermostat’s batteries, running tests by using a multimeter, or responding to error codes could get your thermostat running again.
Now that we have explained how you can detect a bad thermostat, we recommend that you continue reading this article to learn more about what you can do to fix it. This problem can happen and is nothing new, so don’t panic. Stay with us.
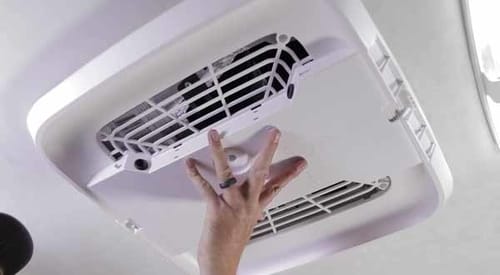
You may also be interested in this topic; How To Clean RV Air Conditioner Filter?
4 Ways to Tell if an RV Thermostat is Bad
Problem 1: The Thermostat is Unresponsive (No Power) or It’s Broken
The most common problem with the thermostat is that the device loses power and won’t turn on. If this is the case, the thermostat may have lost contact with the electrical circuit. The current flow wires were probably released during the trip and are no longer connected to the electrical circuit.
If you are looking to get a new RV Thermostat, we recommend this DOMETIC Thermostat Model.
You will easily recognize this situation if you try to change your RV thermostat’s temperature, and nothing happens. That’s because the thermostat cannot identify the room temperature and thus will not turn on the AC unit. Also, in this case, the thermostat screen may be dimmed or it just won’t turn on. The thermostat screen may also be damaged, which will affect the unit’s operation, and for that reason, you cannot adjust the temperature.
If you are sure that everything is OK with your electrical system, and batteries power your thermostat, you should take into account that the problem may be related to the batteries inside the unit. If this is the problem, then you don’t need to worry. The batteries simply need to be replaced. You can do it yourself without much effort.
If the thermostat still shows no signs of life after replacing the batteries, then there is a chance that it is broken. If the device is broken, damaged, or out of order, you must replace the device with a new one.
Note! It is not recommended to buy a refurbished thermostat. Used thermostats very rarely come with a warranty, and there is a high possibility that you will have a broken device shortly after purchase.
Always buy a new thermostat from an agent or manufacturer. That way you’ll get a warranty on the device, and in case of failure, you can always replace it with a new one.
New thermostats are not expensive (even the new models), but the installation of the device is not cheap since it is recommended to hire a professional for this job. If you plan to install the thermostat yourself, you need a budget between $75 and $150 to replace the old one with a new one, and if you hire an expert for this job, it will cost you between $300 and $400.
Thermostat Models to Explore For Your RV
A programmable thermostat significantly simplifies life in the RV. If you have decided to buy a new thermostat, and you want a better device than the one you had, consider programmable thermostats. Here are some popular models:
- Dometic Model 3109228.001 Comfort Control Center.
- Dometic Model 3314082.011 Comfort Control Center II.
- Coleman Digital Wall Thermostat Model 8330-3862. Comes with plug-type wiring connections.
Problem 2: The Heater Or Air Conditioner Won’t Switch On
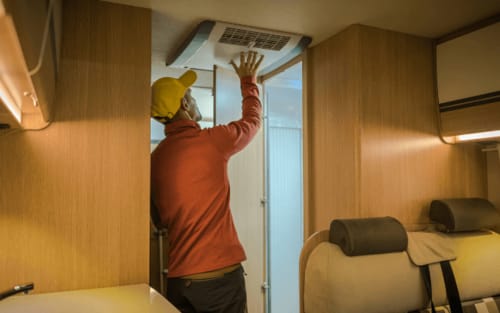
If you notice that there is no electricity going to the thermostat, then the problem is most likely related to dead batteries or damaged wires. For the thermostat to work properly, the wiring must perform its task – to properly transmit and receive electrical signals. To check if everything is OK with the wiring you need to remove the thermostat and look at the unit from the inside. If you cannot see any damage or defects, it is best to take the device to a professional for testing.
Problem 3: The Heater or AC Unit Won’t Switch Off
If the AC device or heater cannot be switched off even after you have pressed the turn-off button several times, there is a high possibility that the device is not correctly calibrated or that the wiring is burnt out. If this is the case, remove the housing from the device and check the wiring harness. If you cannot see any damage or defects, it is best to take the device to a professional for an inspection.
Problem 4: The Room Temperature Doesn’t Match the Thermostats Reading
One of the best signs that the thermostat in your RV is not working as it should is if the room temperature does not match the temperature on the thermostat screen. If you try to raise or lower the temperature inside your RV and the temperature in the room remains the same, there is a possibility that the device needs to be calibrated again.
Do not hesitate to buy a new one if your old one is not working properly. This DOMETIC thermostat model is great, and we recommend it.
Troubleshooting Your RVs Thermostat
Below we will review all the steps you need to take to find out what is wrong with your thermostat. While there may be several reasons why your RV thermostat is not working as it should, our conclusion is that the potential solutions we bring to you below may be what you need to keep your RV thermostat fully operational again. If your thermostat and AC system encounter any of the above problems, keep reading to find a solution to your problem.
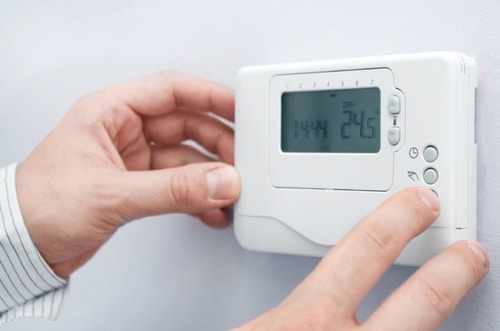
Step 1: Set Correct Settings on Your RV Thermostat
This step seems logical, but you still need to make sure that the thermostat is set for cooling mode in the summer or for heating mode in the winter. If you have a newer RV model with which you have not yet gained much experience, simple mistakes like setting up a heating system can happen.
If your AC device or heater are running continuously for no reason, then they are probably set to “ON”. Find the appropriate button on the unit’s control panel and switch the operating mode to “AUTO“. When using this option, the room temperature will always be ideal. The “AUTO” option ensures the flow of cold or warm air inside the vehicle only when necessary.
Step 2: Adjust the Thermostat Up or Down
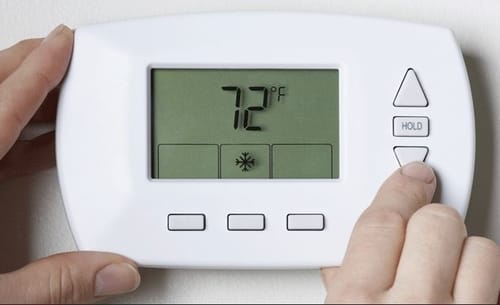
When cooling the interior of your RV during the summer months, set the temperature on your thermostat five degrees lower than what is outside. The same goes for the winter months. Then set the temperature to five degrees higher than the outside temperature.
When you raise or lower the temperature on the device, you will hear a beep to indicate that the device is starting to operate. A few moments later, the device will start working, which you will be able to see according to the way the ventilation opening works.
Step 3: Replace the Thermostats Batteries
Today, most new RV models come with built-in digital thermostats. If yours is one and has trouble working, try replacing the batteries. After replacing the batteries, if the device works, then you know you have solved the problem. But if you put new batteries in the device and it still doesn’t work, the next thing you need to consider is bad wiring. If you have a digital thermostat in your RV, it is best to change the batteries once a year as a precaution to avoid sudden outages due to low batteries.
Step 4: Mechanical Thermostat Problems
In older RV models, you will usually find a mechanical thermostat. You can typically know that you have this type of thermostat when there is a tiny lever on the unit with the help of which you adjust the temperature in the room. With mechanical-type thermostats, the most common problems are related to the issues with the dust in the device, which usually blocks mechanical parts in operation. This problem is often encountered by those who have bought a used RV. Remove the cover from the appliance and clean the inside with a vacuum cleaner.
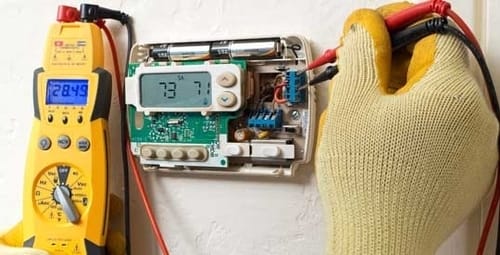
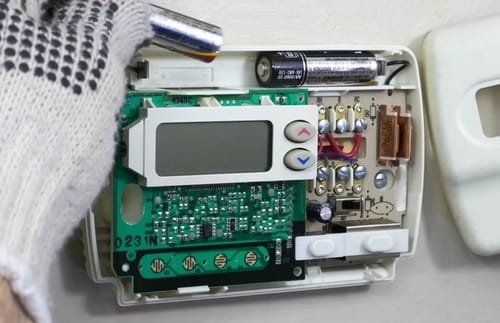
Step 5: Test Thermostats Connections and Wires
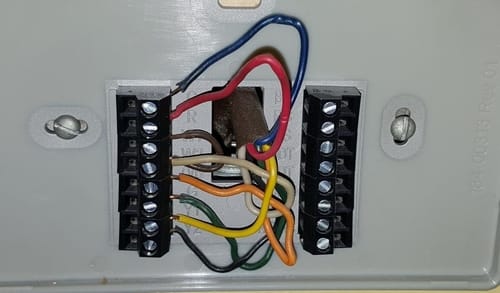
After you have checked all the above options, and your thermostat still does not work, it is time to check the wires. We recommend hiring a professional for this job if you have no experience with wiring. But if you have experience with wiring, remove the cover from the device, inspect all wiring installations, and if you notice that some wires are loose, connect them firmly back in place. Then check if the thermostat is working. Use a multimeter for this job.
Test Your RV Thermostat Wiring
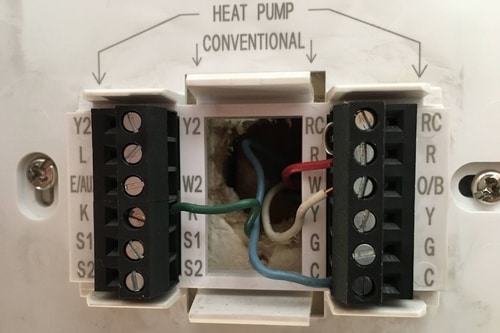
You can test the proper operation of the wiring by inspecting the back of your thermostat. If you have experience with electrical systems and wiring, this step should not be difficult. If you decide to fix it on your own, keep in mind that you will need a multimeter and help from another person. With the help of a multimeter, you will be able to read voltage, current, and resistance and then make a conclusion on whether your thermostat gets enough energy to work.
Keep in mind that this step can only be applied if your thermostat does not run on batteries. If it’s a battery-powered thermostat, and you’ve already put new batteries in the device and nothing is happening, then it’s probably time to buy a new thermostat.
> Get New Smart RV Thermostat Here <
The thermostat in your RV must be placed on a wall where it can be easily removed. Before starting the test, be sure to check that your multimeter is set to DC volts. Set the red probe to the positive terminal and the black probe to the negative terminal to test if there is 12v power coming into the device. If you can’t figure out where to put which probe for help, see the owner’s manual that came with the device.
Proper Way to Replace Your RV Thermostat
When the time comes that you have to buy a new thermostat for your RV, it certainly doesn’t seem like something you’re thrilled about, but it doesn’t have to be that way. Accept this as an opportunity to have one device in your RV at a higher level of quality and efficiency. Take advantage of the situation to enrich your RV with some new digital thermostats that have Bluetooth and other advanced features that can make your life easier.
Changing the thermostat in your RV is certainly not on the list of what you want to do on Saturday, but it still doesn’t have to be difficult. Let’s take a look at what you need to do after checking all the options as to why the thermostat doesn’t work and concluding that you need to buy a new one.
Safety Comes First
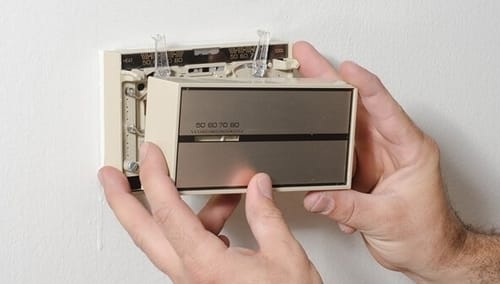
Always think about safety, so first disconnect the AC device or heater from the power, or remove the batteries. This must be done first before anything else, because you may injure yourself. To remove the thermostat from the wall (this is how thermostats are usually installed), read the owner’s manual that came with the device. Detach the device cover and use a screwdriver to remove the thermostat recess from the wall.
After removing the faulty thermostat, be sure to note how the installations were carried out. The best way to do this is to take a photo of the system. It’s also not bad to mark the wires. Then disconnect all the wires of the faulty thermostat and the thermostat bracket. Store the parts you have left after doing this in a safe place.
You may also be interested in this related article, so be sure to read RV Air Conditioner Repair and Troubleshooting Guide.
Final Thoughts
Having air conditioning in Rv is a great thing, but on the other hand, it also has its downsides such as unexpected breakdowns. Sometimes it’s hard to diagnose a malfunction, especially if you don’t have experience with it. In this article, we have described the four most common problems related to bed thermostats and how to fix them. I hope you now have a better insight and that you have learned something new. Keep in mind that if you have never repaired things like this, it is best to consult a professional to avoid any potential injuries related to electricity. If you have any questions feel free to contact us.

Thank you very much for sharing, I learned a lot from your article. Very cool. Thanks. nimabi
Your article helped me a lot, is there any more related content? Thanks! https://accounts.binance.com/tr/register-person?ref=OMM3XK51
Your point of view caught my eye and was very interesting. Thanks. I have a question for you. https://accounts.binance.com/bg/register?ref=V3MG69RO
There is definately a lot to find out about this subject. I like all the points you made